
Canopy Cap
by Franklin Fabrication

SALE: 25% OFF - I have only a few of these remaining in stock. Please see the list of remaining items below.
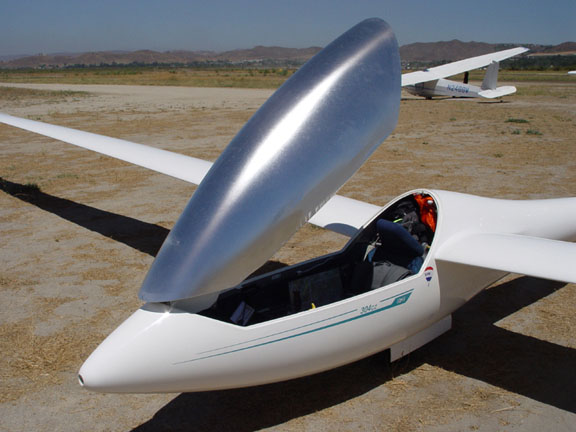
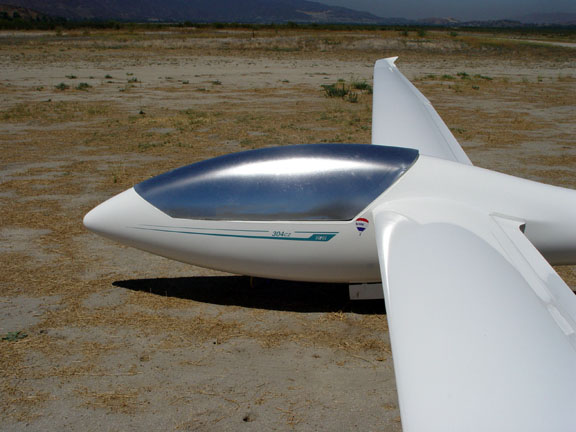
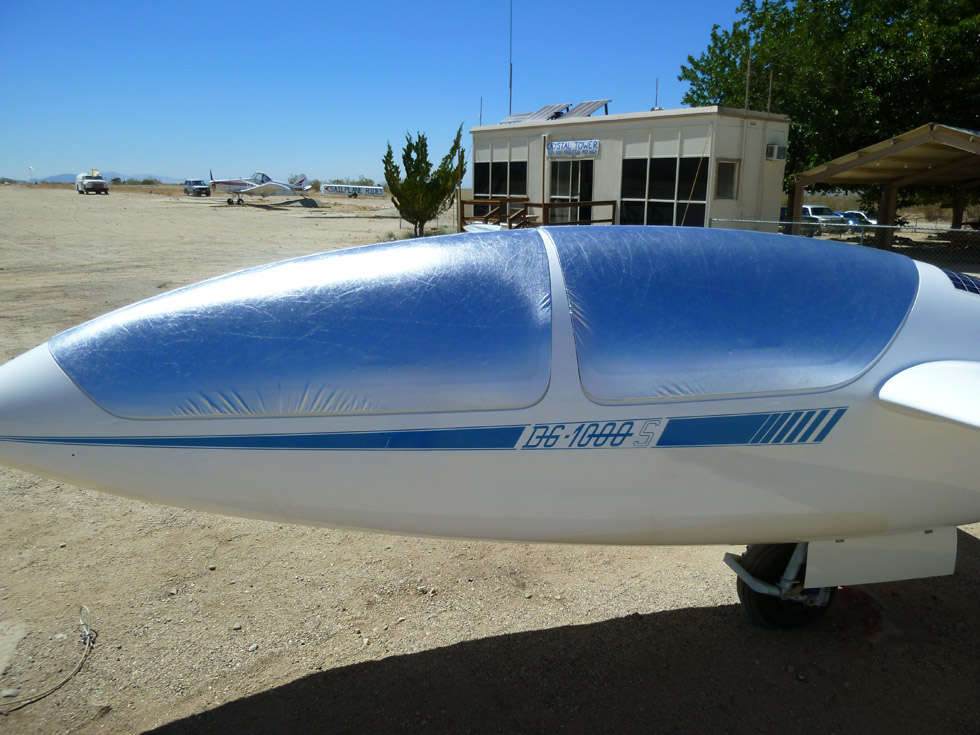
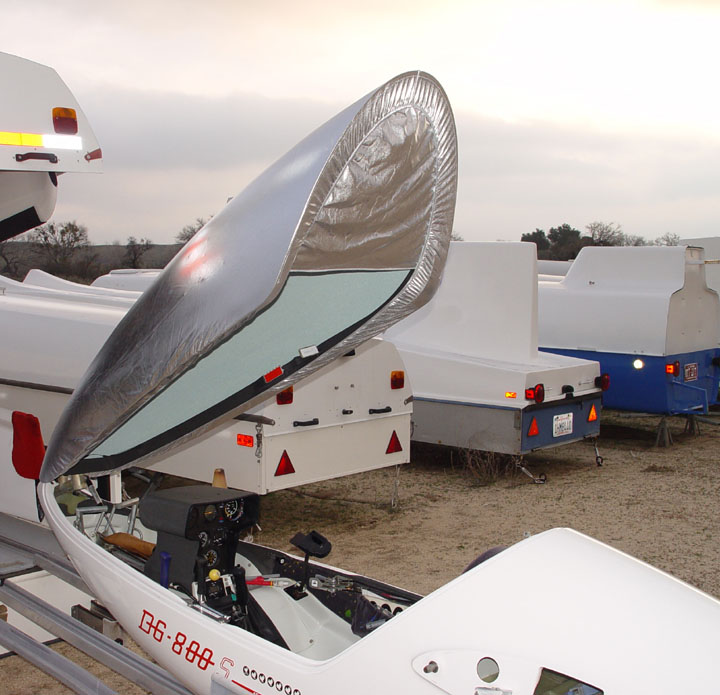
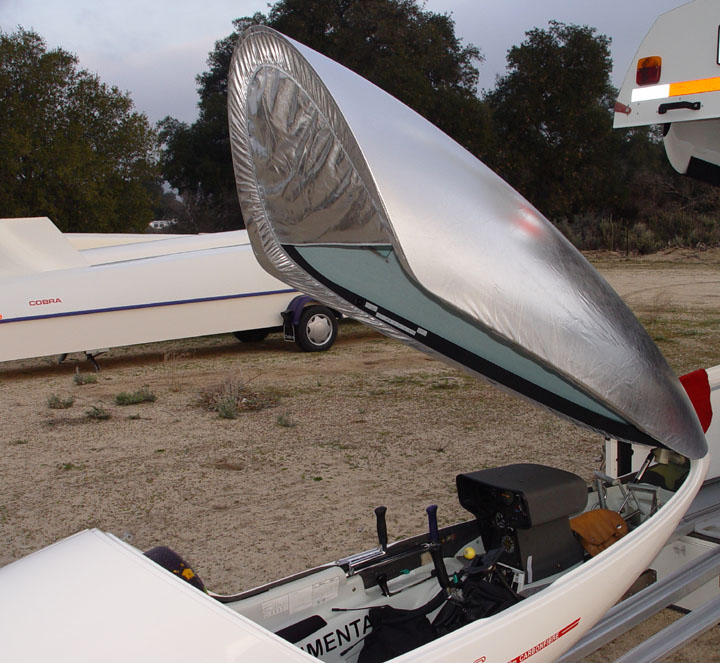
The Canopy Cap is designed to be a light weight, compact, reflective shade cover for use when rigging and while waiting on the grid. The simple design allows easy access and your cockpit is always shaded and cool. When you are ready for take off, slip the cover off and stow it in the included storage bag in the glider while you fly.
Important Notes
- The light weight design is not meant for extended use outdoors.
- It is not a replacement for a heavyweight, all weather cover.
- Do not use it while trailering as it won’t allow the canopy to be locked.
Sun Shield Option
The Sun Shield option is a fabric panel that stretches across the rear of the open canopy. Its purpose is to prevent burns to the instrument panel caused by sunlight reflecting and magnifying off of the canopy. The cost of the option is: $20.00. This option is available only for sailplanes with front-hinged canopies. Click on the images below to view larger versions.
Models are IN STOCK for these Sailplanes - SALE - 50% off
(prices below are the sale prices)
- ASH 25 without SunShield: $87.50
- ASH 25 with SunShield: $107.50
- ASH 26, ASH 31 or Jonker JS-1 without SunShield: $54.50
- ASK 21 without SunShield: $107.50
- HPH 304C, 304CZ, Mosquito 303, Hornet C without SunSheild: $54.50
- HPS 304S Shark without SunShield: $54.50
- Jonker JS-1 Revelation without SunShield (same pattern as ASH 26/31): $54.50
- Jonker JS-1 Revelation with SunShield (same pattern as ASH 26/31): $64.50
- Jonker JS-3 Rapture without SunSheild: $54.50
- Jonker JS-3 Rapture with SunSheild: $64.50
- PW-5 Smyk with SunShield: $64.50
- Schempp-Hirth DuoDiscus, DuoDiscus X, Jancus C, Nimbus 3D, Nimbus 4D (Order version for 2-place gliders with 1 large canopy): $79.50
- Schempp-Hirth DuoDiscus XL, Arcus, Nimbus 4DL (Order version for 2-place gliders with 1 large canopy): $79.50
Excellent YouTube Videos of the Canopy Cap by Body Willat from http://www.easycanopycovers.com/
Review of the Canopy Cap by Greg Arnold
from Southern California Soaring, April/May/June 2008 Edition
You probably have seen it – a glider on the ground with a silver canopy that, on closer inspection, actually is a canopy covered with a formfitting silver “canopy cap.” This new soaring item is produced by Cheryl Franklin of Franklin Fabrication. Cheryl is the wife of Region 12 pilot Dan Fitzgerald.
Called the Platinum Canopy Cap, the product is not intended to replace the traditional canopy cover. The Cap does not protect from rain or dust, and the canopy cannot be latched when it is installed. Instead, the purpose of the Cap is to keep the sun out of the cockpit before and after flying. The traditional canopy cover will do that, of course, but it is relatively hard to install, and once installed the canopy cannot be opened unless the cover is removed.
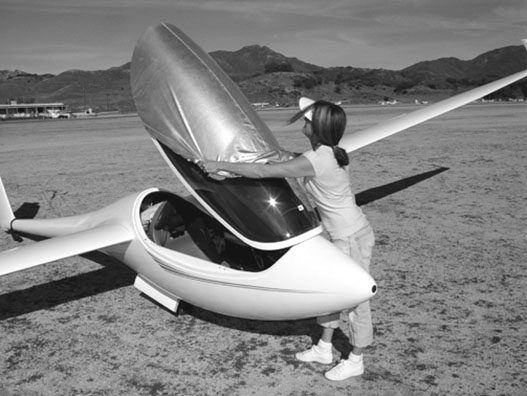
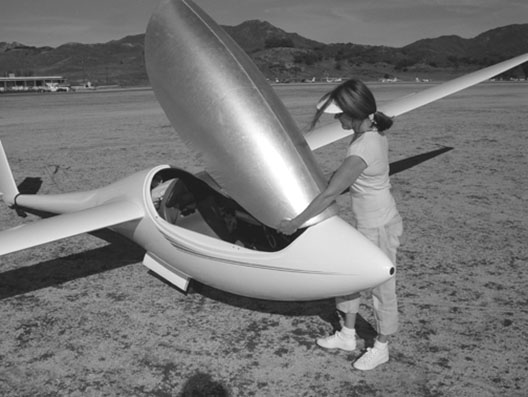
By contrast, the Cap is easy to install. It is elasticized on the perimeter like a shower cap, so you just put it around one end of the canopy, and then stretch it and put it around the other end. More important, once it is installed, the canopy can be easily opened and closed without removing the cover. This is important while waiting to launch, since you will want to get into the cockpit at times, but it is inconvenient to have to remove and reinstall the cover each time.
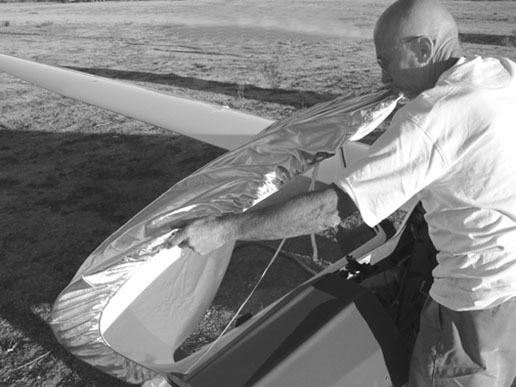
Originally, the cap was not available for side opening canopies, as such canopies have interference from the hinges. A modified design fixed that. The cover for side-opening canopies has two elastic straps, one permanently mounted, and the other with one loose end with a plastic snap. Due to the design, the side-mounted cover takes a few seconds longer to mount than the front-hinged cover. However, like the front-hinged cover, once it is mounted it can be left on the canopy while it is opened and closed.
My glider has a side-hinged canopy. While the Cap may be marginally more difficult to mount than on a front-hinged canopy, the additional inconvenience really is not noticeable. What is noticeable, however, is that the Cap is much easier to install than the traditional canopy cover. No need to try to get a number of straps to end up in the right place under the fuselage and behind the wings. And, of course, the canopy can be easily opened and closed.
The cap comes complete with a small bag, and in the bag the Cap takes up much less room than a conventional cover. Just take off the Cap, stuff it in the bag, and throw the bag behind your head.
The original concept for the Cap came from Bill Liscomb, who wanted a "shower cap" type cover made from a bed sheet. After Cheryl made him one, the word spread, and the Canopy Cap was born.
Next, the shift was made to the current material. It is a reflective four-way-stretch material with a laminated coating. Dan reports that it has fair abrasion resistance and will not fray if cut. The silver coating will lose some of it's brightness with use, but none of its function. Dan says that a user can expect at least two seasons of frequent use while waiting on the grid in our Southwest desert conditions. The cover can be hand washed using a mild detergent such as Woolite. Hang it indoors to dry. Do not iron.
The final development of the cover occurred when Pat Russette came up with the idea of the Sun Shield. This is a flap at the back of the cover that prevents the low sun in the winter from bouncing off the inside of the canopy and reflecting downward to burn the glare shield (see photos)..
Note: I have had a customer mention that I should clarify that since the Canopy Cap wraps around the edges of the glider canopy, it is not possible to latch the canopy closed while the Canopy Cap is in place. The customer was concerned that his Nimbus 3 canopy would blow open. However, I have sold literally hundreds of Canopy Caps for use on gliders with side-hinged canopies and I have not had any complaints of issues with the canopy blowing open. Due to the weight of the canopy I think it is unlikely to be a problem.
How to Use Your Canopy Cap
Click on the images below to view larger versions.
Version for Front-Hinged Canopies | Find the care label near the center seam. This is the front of the canopy cover. Place the rear of the cover over the back of your raised canopy and hook the elastic around both rear corners. |
 | Pull the cover forward and hook the elastic around the front of the canopy and at both front corners. |
 | Straighten the center seam to align down the middle of the canopy and adjust any wrinkles along the sides until smooth. You can now raise and lower your canopy at will during set up and while on the grid. There are no inconvenient straps to get in the way! The Sun Shield option (not shown) will prevent damage to your instrument panel caused by the sun’s rays magnifying off of the inside of your raised canopy. |
 | Find the care label near the center seams. This is the front of the canopy cover. Stand on the left side of the glider with the canopy open. Hook the elastic over the front corners of the canopy with the strap underneath the canopy frame. |
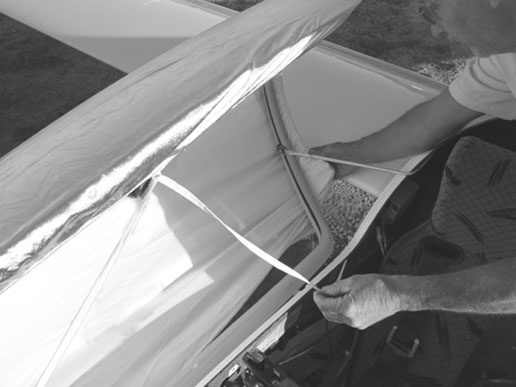 | Pull the cover toward the rear, then hook the elastic over the rear corners of the canopy. |
 | Connect the strap to the buckle. Straighten the center seams to align down the center of the canopy and adjust any wrinkles along the sides until smooth. You can now raise and lower your canopy at will during set up and while on the grid. There are no inconvenient straps to get in the way! |
Refine Search

CanopyCap-1-Canopy
Canopy Cap - Single Seat Glider with 1 CanopyEnter the sailplane type at check-out. Be sure to..
$54.50 $109.00

CanopyCap-1-Lg-Canopy
Canopy Cap - Two-Seat Glider with 1 Large CanopyEnter the sailplane type at check-out. Be sure..
$79.50 $159.00

CanopyCap-2-Canopies
Canopy Cap - Two-Seat Glider with 2 CanopiesEnter the sailplane type at check-out. Be sure to ..
$87.50 $175.00